Fragmentor Editor
Learn how to use the Fragmentor Editor to create stunning Tebex Templates.
Create Projects
Select Components
Choose Styling
Download Files
Installation & Setup
Learn how to install your Tebex Template & Theme using the Tebex Template Editor.
Upload Template
Upload Theme
Configure Template
Common Mistakes
Fragmentor is a webbased tool that enables individuals and business owners to create and customize Tebex themes & templates. This guide goes over the basics you need when using our editor. We'll go over how to create an account, how to create projects and how to actually design your theme & template.
If something still seems unclear to you, or you're stuck with other questions, don't hestitate to reach out to via email or Discord. We're always open to suggestions on making this guide better!
Create an Account.
In order to start using our Tebex template builder, you need to create an account on Fragmentor. You can sign up using your email and a password, or use Google Auth. Use any account details you like, but we do require you to use legitimate email addresses. Each person is allowed to own one account; accounts cannot be shared among users.
We require you to sign up in order to save the templates you create so you can access them at any time later in the future. Hence it is strongly advised to take good care of your account as this will be the place where all of your projects will be saved.
Create a Project.
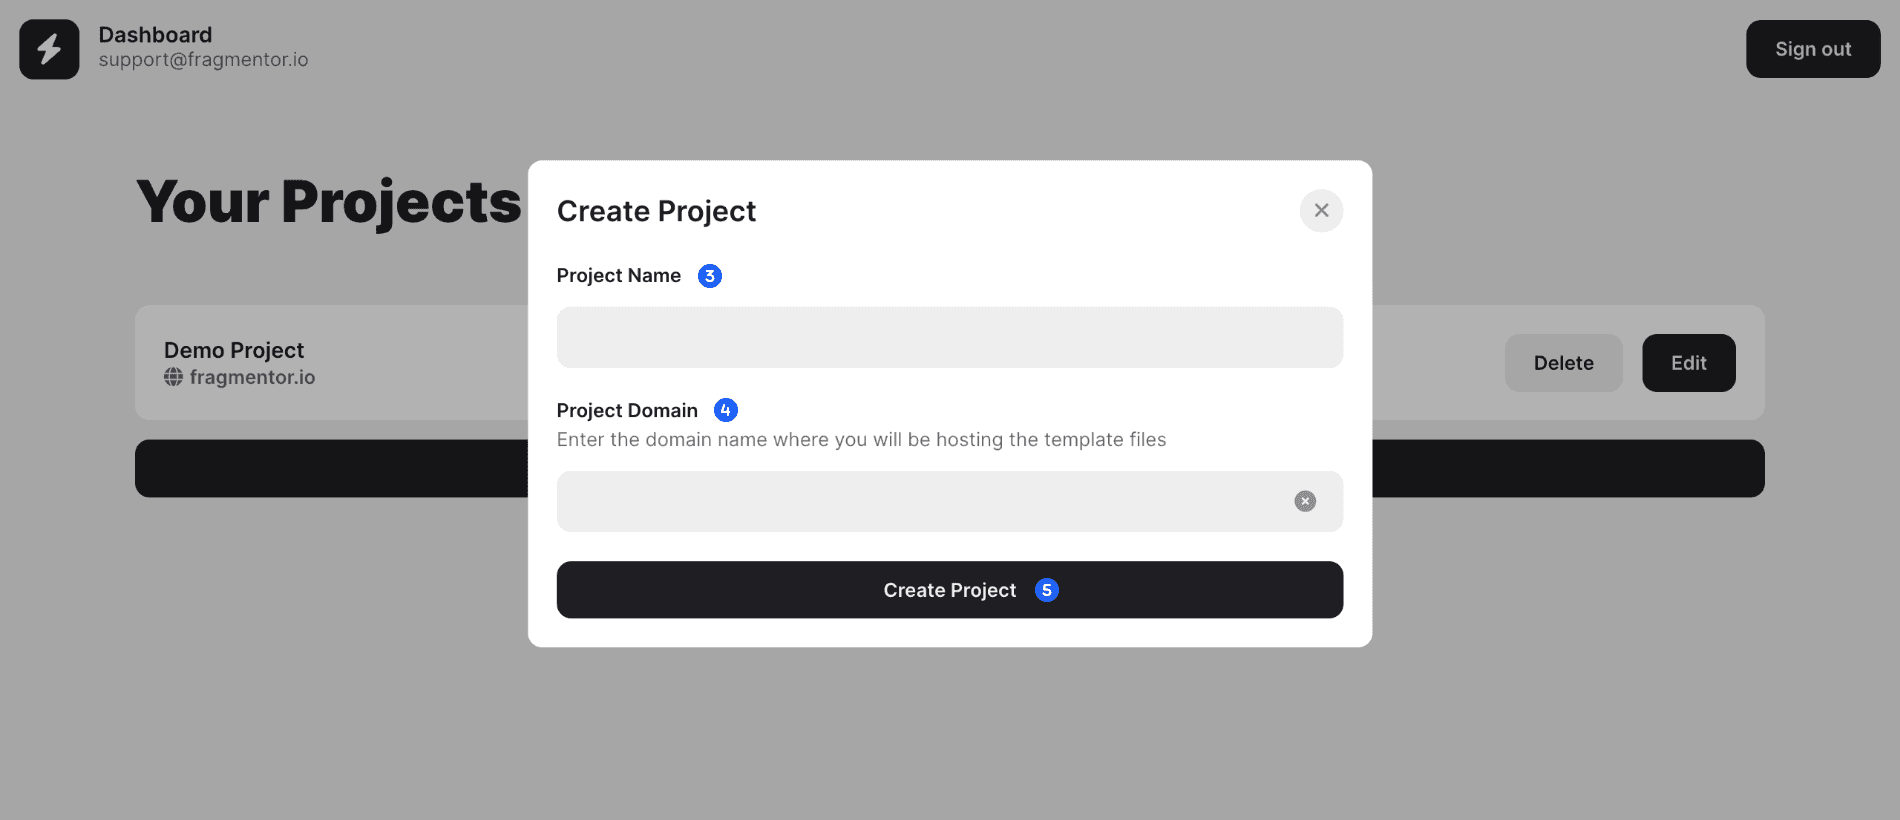
Before jumping straight into the editor, you'll need to create a project. A project is defined by a project name and a domain name. The domain name you enter upon creating a project, is the same domain you will host your Tebex store on. We do check validity of your domain, so make sure it exists and redirects to a Tebex store.
- Sign in to your account and navigate to the dashboard page.
- Click the "New Project" button.
- Enter a project name. This can be the name of your Tebex store, or any other name you'd like.
- Enter a domain name. This is the URL entered in the search bar when people visit your webstore.
- Click "Create Project".
You can create up to 1 project with a Starter subscription, and up to 5 projects with a Pro subscription. Because each project is linked to a domain name, that also means you can only use the template & theme files on the domain you have set for your project. That way you can use the files on up to 1 store with a Starter subscription, and up to 5 stores with a Pro subscription.
It is also important to note that domain names are unique across projects and users. If your domain name is linked to a project of another user, you won't be able to use that domain name to create your own. To report instances of abuse, reach out via support email.
Edit a Project.
Editing a project is very straightforward. Navigate to your dashboard page, look for the project you would like to edit and click the "Edit" button. Our editor lets you customize certain aspects of your template & theme. This will open up the template & theme editor. Let's first go over a few of the core aspects of the editor and explain in detail what they are meant for.
Disclaimer: What's shown in the preview is an example store. The template will eventually adapt your own Tebex settings.
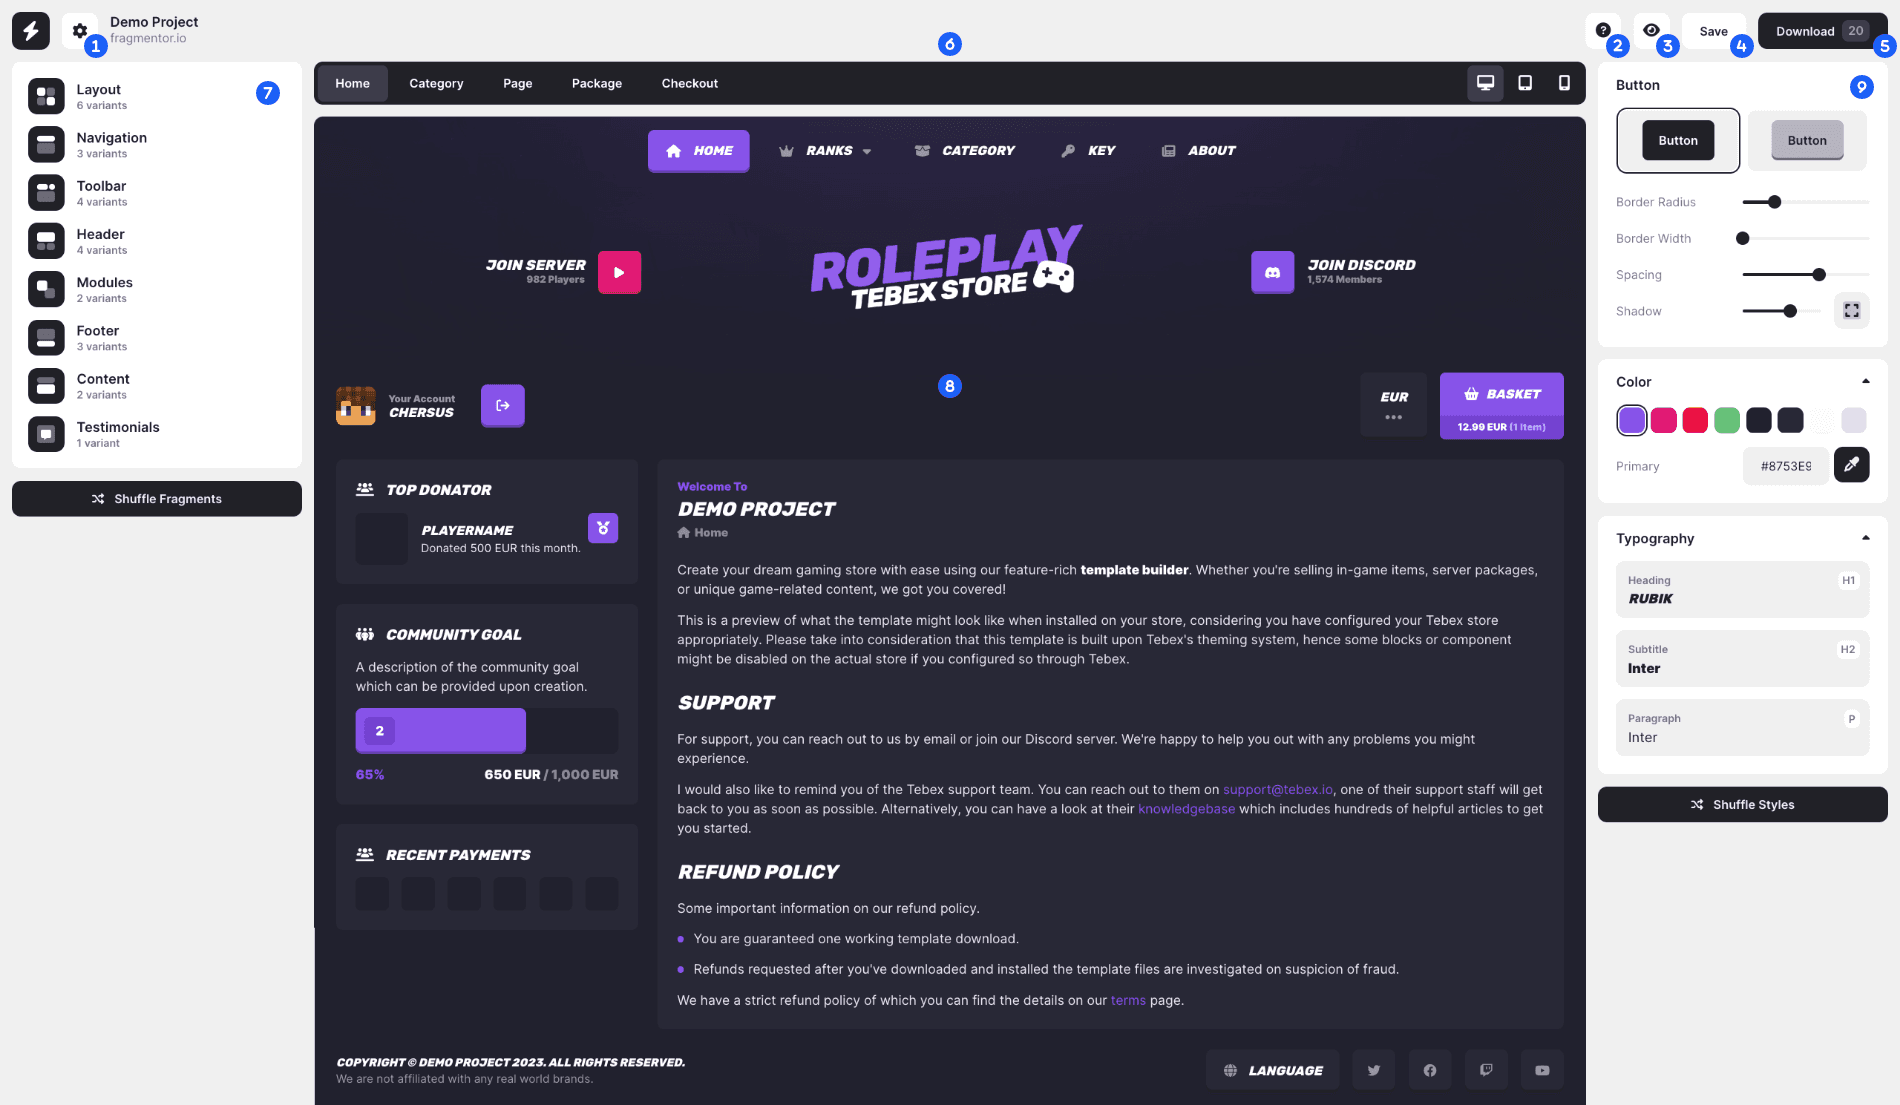
- Project Settings
This will open a popup with the most important settings to configure your project. Here you are able to update the project name and domain name. More importantly, you can set a logo and banner image for your project. The logo and banner image will then be displayed in the preview. - Documentation
This button will trigger the documentation page on how to use Fragmentor. - Preview & Edit
The editor has two main modes, you can either "Edit" or "Preview" a project. When in "Preview" mode, all styling and component selection features will be hidden and a full width preview of your design will be shown. - Save
Hit this button to save the changes you made to the template & theme so you can access it at a later time! - Download
This button will send out a request to our server to prepare your templates files. You will receive a ZIP file containing the source files you'll need to upload in the Tebex template editor. - Page & Device Selection
Here you can preview a specific page and set the device size. All code we provide is mobile responsive. - Component Explorer
In the left sidebar panel, you'll find the different components that make up your template. When clicking on a specific category, you'll be presented with a list of possible component variations to choose from, as well as some configuration options to make them even more unique. - Preview
The main section of the editor previews what your Tebex store might look like when the theme is installed. Note that, depending on how you've setup your store, the actual content might differ. For example, you might have different sidebar modules enabled, have different welcome text or have completely different packages. That's all normal! We only provide the styling of your store and do not setup the actual content. - Style Editor
In the right sidebar panel, you can style the components you previously selected. These settings make up your "theme", using jargon you might be familiar with. Among many other things it includes options to change the color and typography.
Note: Projects are not auto-saved. If you made changes to your template, be sure to hit the "Save" button at the top so your changes won't be lost.
Select Components.
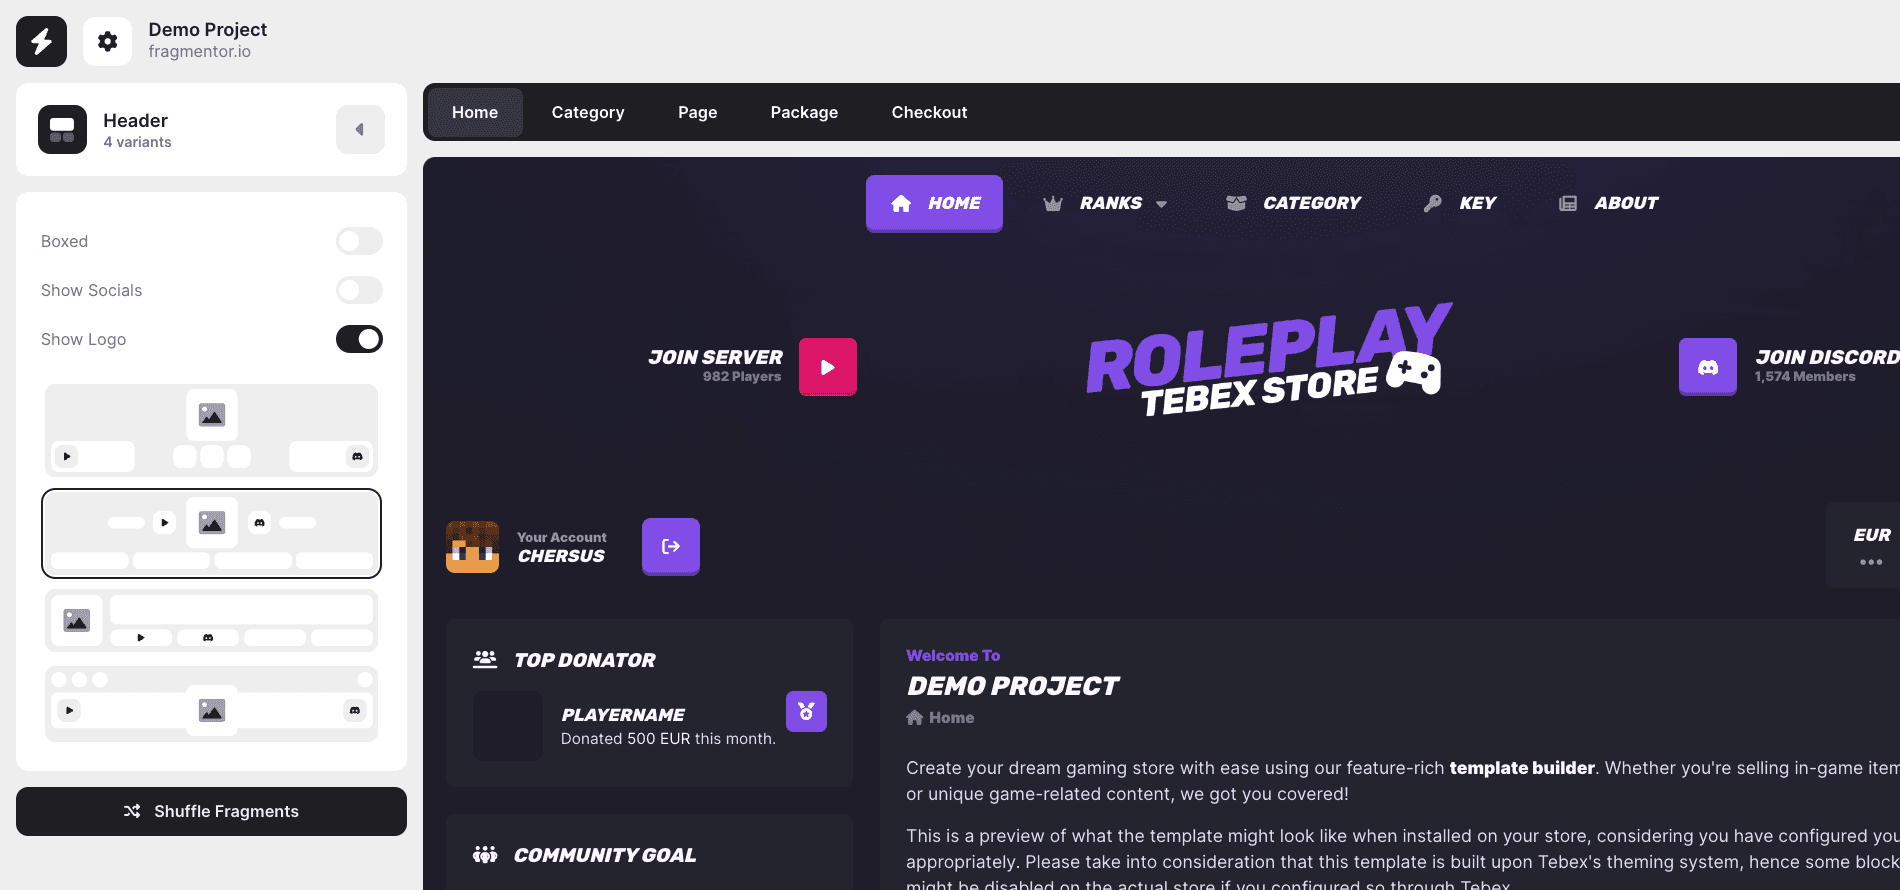
The left sidebar panel contains component categories that will change depending on the page you are previewing. Upon selecting a category, you'll be prompted a set of component variants to choose from. From here, simply select the one you like best! Our component library is updated regularly and new components are added every now and then.
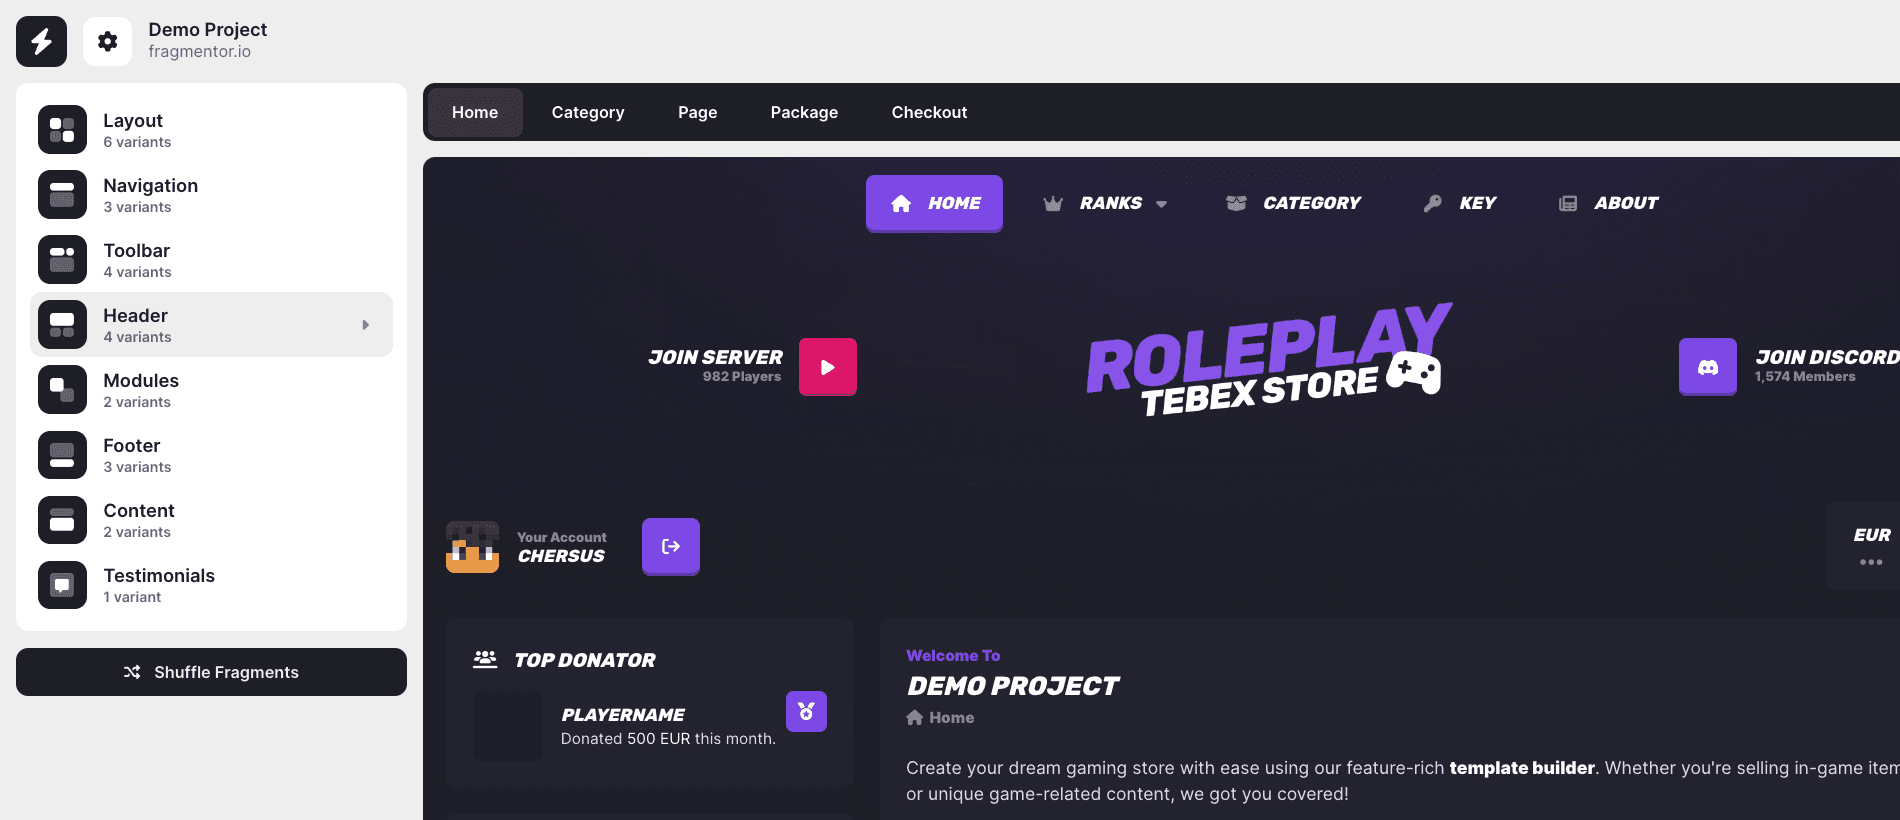
Along with the different component variants, we also have some global options for each category. These can be configured to make your store even more unique! You will also notice a "Shuffle" button right underneath the components panel. With just a single click, this button can be used to randomly select component variants and combine them into one template. Please use with care, as this will overwrite all previous edits you might have made (up until the last save).
Disclaimer: Besides the customization options readily available through our editor, we also offer to do additional changes on commission. If the components do not have the level of flexibility or freedom you are looking for, we can help you out!
Choose Styling.
The terms "theme" and "template" are often used interchangeably. Tebex refers to templates as the HTML code (or skeleton) of your webstore, while a theme is the CSS (or styling) applied to that template. Moving over to the right side of the editor, you will notice a handful of styling options to choose from. The right sidebar has 3 customization categories. You can choose a button style, select colors and setup fonts for different headings.
Hint: If you already have a logo going, then it is advised to match the colors of your logo with the colors of the website. Having a consistent color palette across all media will gain you credibility as a brand.
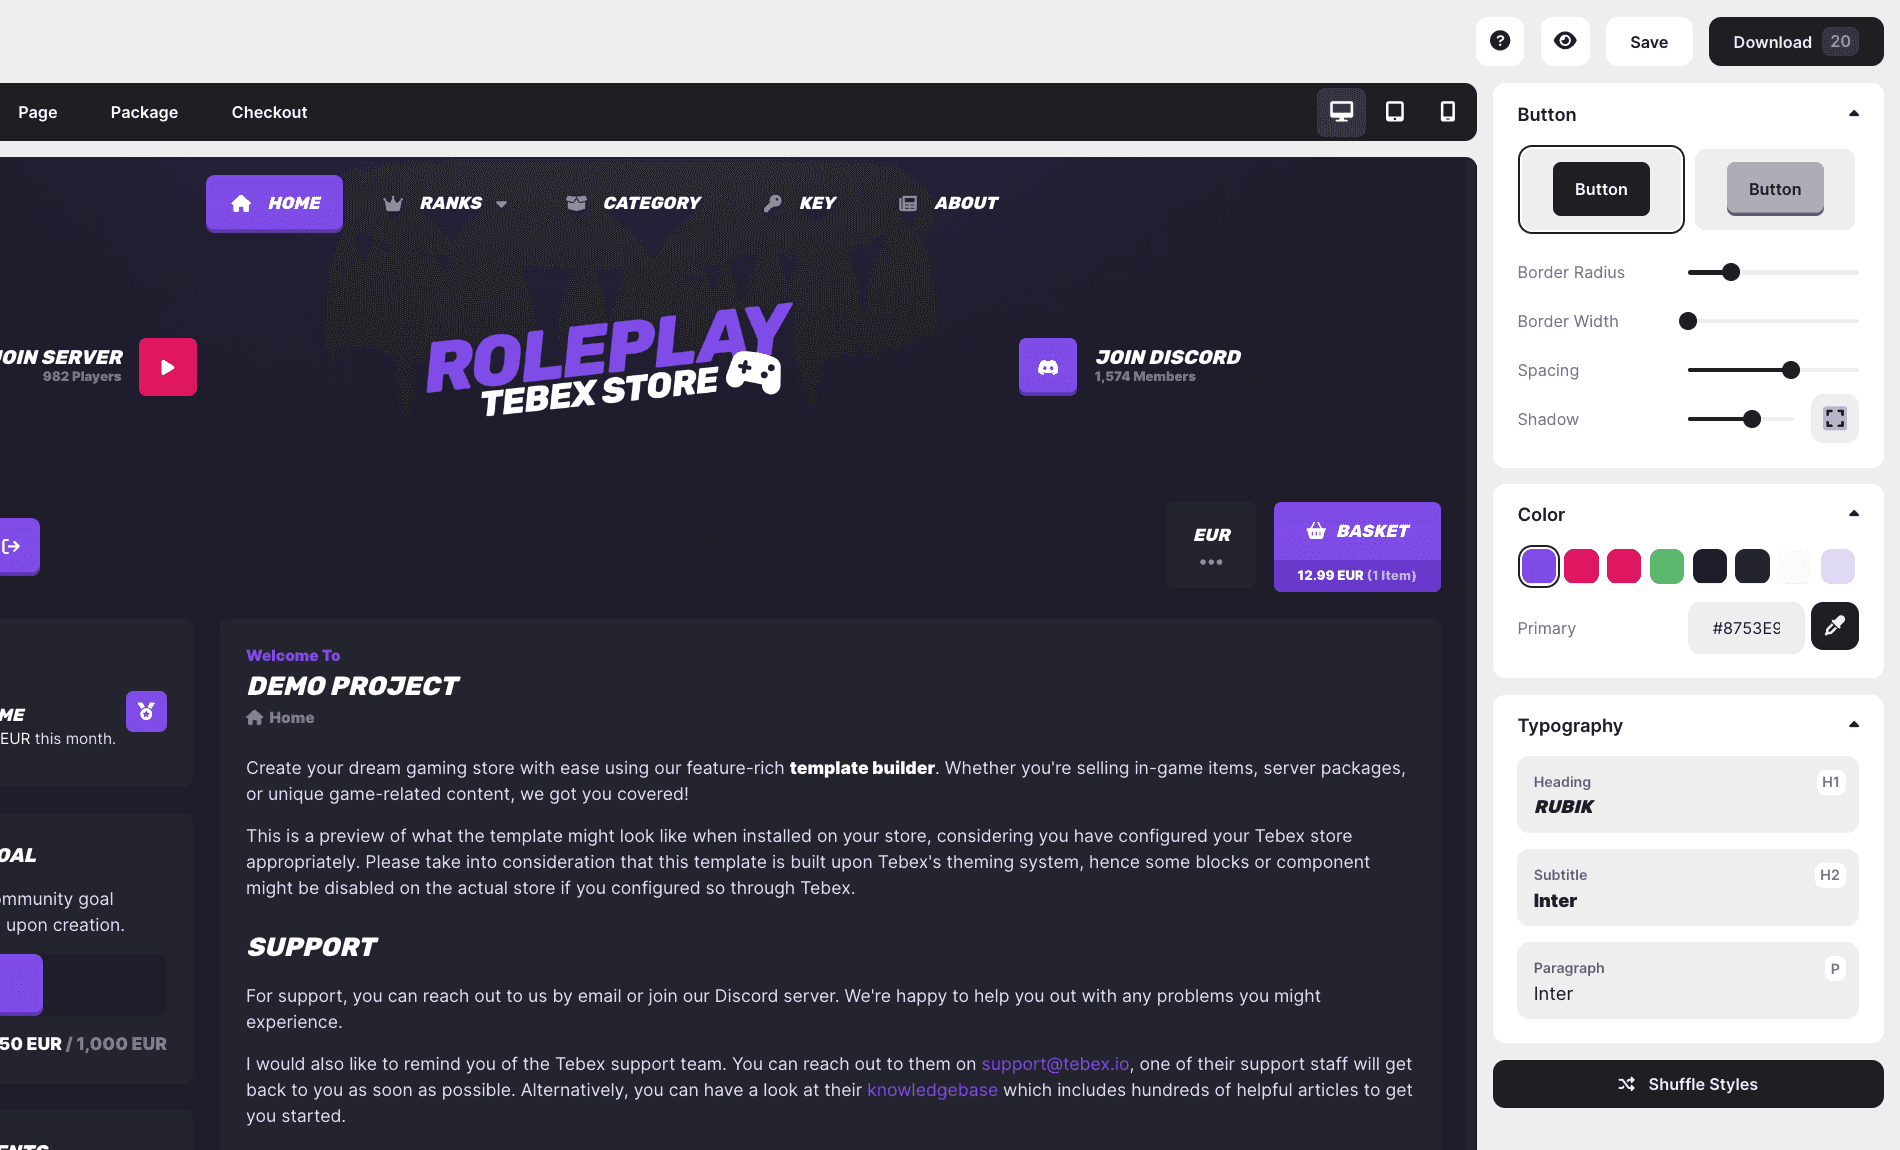
Hint: If you're not confident styling your webstore, we'll do it for you.
Download Files.
When you're all set and done, hit the "Download" button and we'll prepare the files for you. These files will need to be uploaded in the Tebex Template Editor, more details on this in the Installation guide.
You granted up to 5 downloads a week with a Starter subscription, and up to 20 downloads a week with a Pro subscription. We put limits on the amount of downloads to prevent abuse. If you have any specific questions regarding these limitations, do not hesitate to send us a message.