Fragmentor Editor
Learn how to use the Fragmentor Editor to create stunning Tebex Templates.
Create Projects
Select Components
Choose Styling
Download Files
Installation & Setup
Learn how to install your Tebex Template & Theme using the Tebex Template Editor.
Upload Template
Upload Theme
Configure Template
Common Mistakes
This guide assumes you've downloaded a Template through Fragmentor, an online tool to help you build Tebex templates. If you have not been able to do that yet, please read through our guide on how to use the editor.
For people have worked with Tebex before, installing a template should be nothing new to you. If you have not, then please don't worry! The process is very straightforward, you can have the theme running in just a few minutes.
Create a Template
Tebex refers to templates as the HTML code (or skeleton) of your webstore, while a theme is the CSS (or styling) applied to that template. We first install the template.
- Navigate to the dashboard of your Tebex webstore.
- Go to Webstore > Appearance > Change Template and click "Create Custom Template".
- Enter a name for your template and select the base Flat template. Hit "Create".
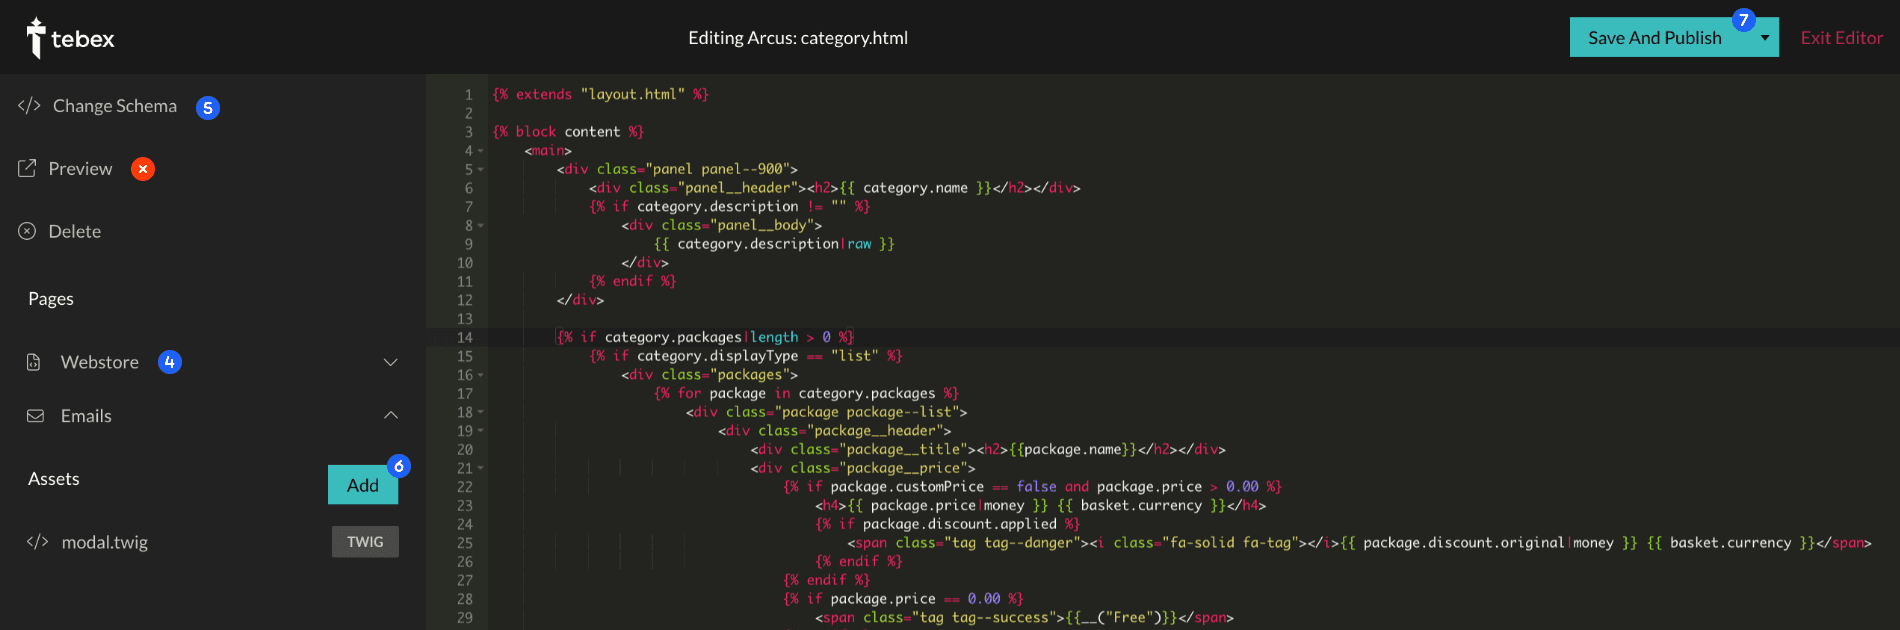
- Copy and paste all files from the "Template"-folder (of the download) to the corresponding template files in the Tebex Template Editor.
- Copy and paste the JSON-file from the "Schema"-folder (of the download) into the Tebex Template Editor where it says "Change Schema" at the top of the sidebar.
- Upload all files from the "Assets"-folder (of the download) in the Tebex Template Editor using the "Assets"-button at the bottom of the sidebar.
- Once that's done, hit "Save and Publish".
Warning: Never use the "Preview" button when working on template changes. Doing so will preview your webstore without a theme (or CSS) and will look strange. If, by accident, you did press this button, then please clear your cache to get the problem resolved.

Create a Theme
Once the template is saved and published, it is time to upload the actual theme or styling. This time, the process is easier as you only have to copy/paste on single file. If you used our editor to change just styling in between downloads, then you just have to redo this part of the documentation.
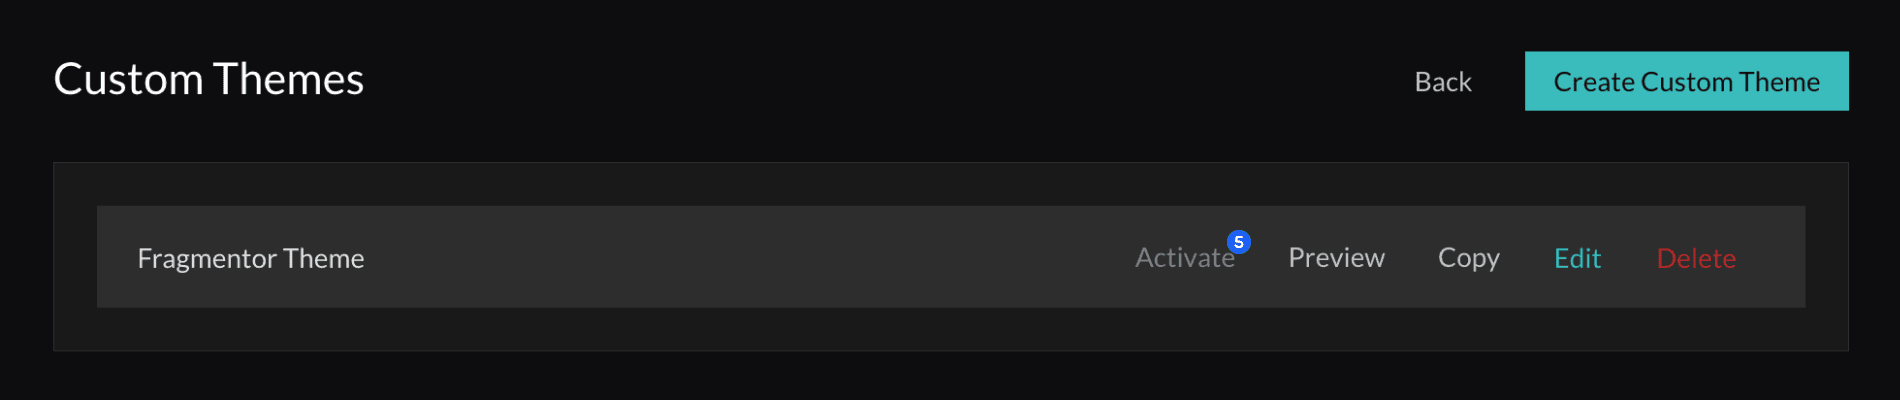
- Go over to Webstore > Appearance > Themes and click "Create Custom Theme".
- Enter a name for your theme.
- Copy and paste the CSS-file from the "Theme"-folder (of the download) into the Tebex Theme Editor.
- Once that's done, hit "Create".
- Activate your theme.
Warning: Themes are not enabled by default, make sure you activate it after creation!

You are all set and stones! The only thing left is setting the configuration options of your template.
Template Configuration
In order to make your template portable, certain settings are extracted from the actual template files. These options are not hardcoded and allow you to easily change them without the need to redownload the template. If you have done all the previous steps correctly, then you should be able to access the template configuration options when navigating to Webstore > Appearance > Edit Template.
Disclaimer: If these options do not appear, please double check you have correctly uploaded the "Schema" file as explained in Create a Template.
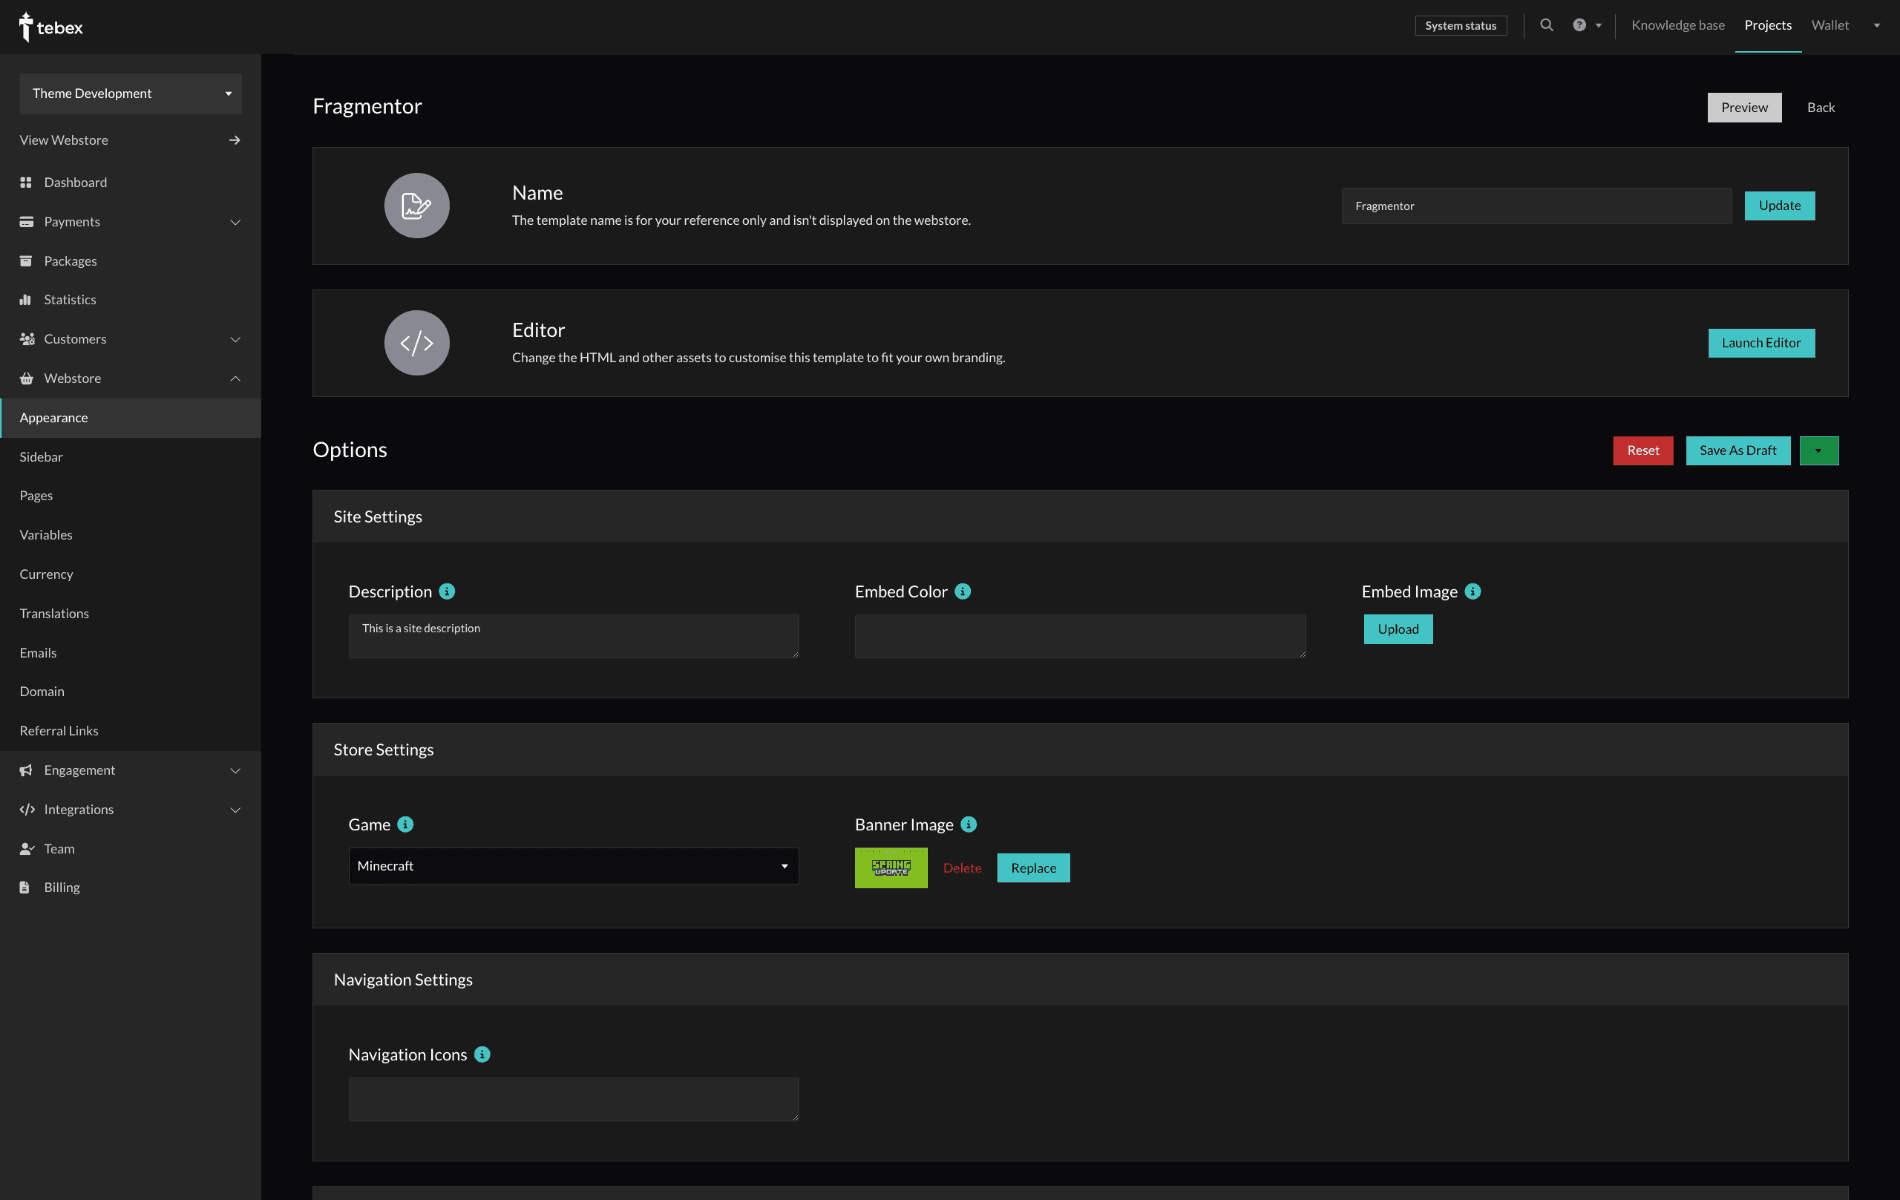
There is a whole range of options. Some of them you will need to fill in, others can be left blank. In order to know what options might be interesting, hover the "information" icon to get details about it. If one of the options remains unclear to you, do not hesitate to reach out to us via email or Discord.
Common Mistakes
- Make sure you have both the Theme and Template activated.
- Check whether you have copy/pasted all files.
- Use a code editor like Visual Studio Code or NotePad++ to open the download files in.
- Do not "Preview" the template, always use "Save & Publish"